




Genshin Impact Version 7.1 Stygian Onslaught Guide: Boss Mechanics, Best Teams, and Tips

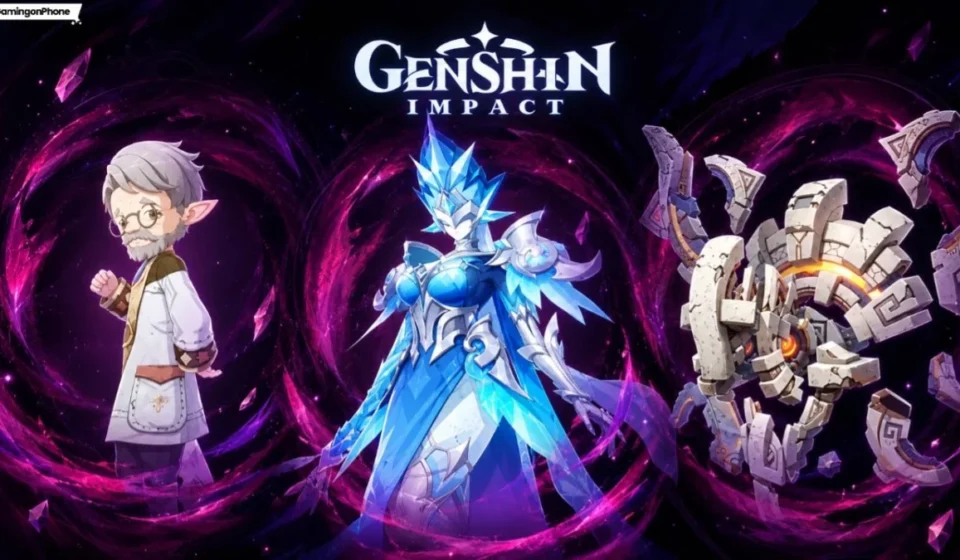
The highly anticipated Stygian Onslaught, the most challenging endgame content introduced in Genshin Impact Version 7.1, has officially launched, presenting players with a formidable gauntlet of three distinct bosses spread across six escalating difficulty stages. This seasonal event offers adventurers the opportunity to earn substantial rewards, including coveted Primogems, valuable Dust of Enlightenment, generous amounts of Mora, essential Hero’s Wit, and a plethora of Artifacts, vital for character progression. Success in this demanding challenge hinges not merely on brute force or optimized gear, but on a thorough understanding of each boss’s unique mechanics and the strategic assembly of synergistic teams. This guide aims to provide a comprehensive breakdown of these mechanics and recommend optimal team compositions to ensure victory and maximize reward acquisition.
Contextualizing the Challenge: Genshin Impact’s Evolving Endgame
Genshin Impact, HoYoverse’s globally acclaimed open-world action RPG, has consistently expanded its vast world of Teyvat, introducing new regions, characters, and intricate combat systems since its launch. A cornerstone of its enduring appeal lies in its dynamic elemental combat, where combinations of Pyro, Hydro, Electro, Cryo, Anemo, Geo, and Dendro elements create powerful reactions essential for overcoming adversaries. While the exploration and narrative elements form the core experience, the game’s endgame content, primarily epitomized by the Spiral Abyss, serves as the ultimate test of a player’s roster depth, character building, and combat proficiency.
Version 7.1, a significant update, not only introduced two new characters and celebrated the game’s sixth anniversary with a free limited character, but also unveiled the Stygian Onslaught as its pinnacle combat challenge. Unlike the fixed bi-weekly reset of the Spiral Abyss, seasonal events like Stygian Onslaught often introduce novel mechanics, unique boss encounters, and specific elemental or reaction-based advantages, compelling players to adapt their strategies and explore new team synergies. The introduction of the "Stellar Glimmer" reaction, seemingly central to this event, signifies a deliberate effort by HoYoverse to innovate and diversify combat meta, encouraging players to experiment beyond established norms. This event, available for a limited duration, pushes the boundaries of player skill, rewarding those who master its intricacies with resources crucial for continued character development in anticipation of future updates.
Event Mechanics: The Stygian Onslaught Revealed
The Stygian Onslaught unfolds across six distinct difficulty stages, each progressively challenging players with increased enemy health, damage output, and potentially more stringent time limits. To triumph and claim the array of rewards, players must overcome three formidable bosses, each possessing unique attack patterns, defensive capabilities, and elemental weaknesses that demand tailored approaches. The core philosophy of this challenge, as highlighted, is that mechanical understanding supersedes raw power; even a perfectly geared team will falter without proper execution of counter-strategies. The rewards structure is tiered, meaning higher difficulty stages yield greater quantities of Primogems, Mora, Hero’s Wit, Dust of Enlightenment, and potentially higher rarity or more desirable Artifact sets, incentivizing players to push their limits.
In-Depth Boss Mechanics and Strategies
To provide a comprehensive guide, we will now delve into the specific mechanics of each boss within the Stygian Onslaught, outlining their origins, abilities, and the most effective methods for their defeat.
1. Churin
Origin and Lore: Churin is presented as a "local legend from Snezhnaya," a frosty, militaristic nation ruled by the Cryo Archon, the Tsaritsa, and home to the Fatui organization. The environment and the boss’s abilities, such as summoning Ice Cubes and attacking with Snowballs, strongly align with Snezhnaya’s frigid characteristics, suggesting a connection to the region’s harsh natural elements or perhaps a construct imbued with Cryo power.
Core Mechanics:
At the outset of the battle, Churin initiates its primary defensive mechanism by summoning two Ice Cubes. These cubes quickly transform into imposing Sculptures. The critical aspect of this mechanic is a timed challenge:
- Failure Condition: If players fail to destroy these Sculptures within a specified timeframe, they activate, launching powerful Giant Snowballs at the active character, dealing significant damage. Simultaneously, Churin gains a substantial increase in its resistance to all elemental damage, making it exceedingly difficult to defeat.
- Success Condition: Conversely, if players successfully break both Sculptures before the timer expires, Churin is left vulnerable. It loses its elemental resistance buffs, entering a weakened state where it takes increased damage from all sources for a duration, providing a crucial window for offensive action.
Strategic Weakness: Churin is explicitly stated to be "weak against the Stellar Glimmer reaction." This implies that the Stellar Glimmer reaction is not only effective for breaking the Ice Sculptures rapidly but also likely amplifies damage against Churin itself during its vulnerable phase. Understanding the elemental components of Stellar Glimmer (which, in the context of Genshin Impact, would typically involve two or more specific elements reacting) is paramount for effective team building.
Counter-Strategy: Prioritize characters that can consistently and rapidly trigger the Stellar Glimmer reaction. Upon the summoning of Ice Cubes, immediately focus all available Stellar Glimmer application on the Sculptures. Once they are shattered, unleash high-burst damage against Churin while its resistances are lowered. Maintaining consistent Stellar Glimmer application throughout the fight, even outside the sculpture phase, might also contribute to overall damage or debuffs against the boss.
2. Secret Source Automation
Origin and Lore: The Secret Source Automation is designated as a "world boss from Natlan," the upcoming Pyro-aligned nation known for its themes of war and combat. Its mechanical nature, combined with a "Cryo bar," suggests a sophisticated piece of ancient technology, perhaps designed for extreme environments or as a combat automaton from Natlan’s past, despite its Cryo-centric weakness. This juxtaposition hints at a technological marvel rather than a purely elemental creature.

Core Mechanics:
Unlike Churin, the Secret Source Automation does not rely on summoned constructs but rather possesses an intrinsic "Cryo bar" that governs its vulnerability:
- Defensive State: At the beginning of the encounter, the Secret Source Automation is protected by this Cryo bar, which significantly reduces the damage it takes from all attacks. This bar acts as a shield or a state of heightened defense.
- Vulnerability Condition: To effectively deal damage to the boss, players must first deplete this Cryo bar. The primary method for doing so is through "rapid Cryo attacks." Each successful Cryo application contributes to reducing the bar’s integrity.
- Damage Window: Once the Cryo bar is fully depleted, the boss enters a vulnerable state, allowing characters to deal full damage. This window is temporary, and the Cryo bar will eventually regenerate, requiring players to repeat the process.
Strategic Weakness: The boss is "weak against rapid Cryo attacks." This specifies that not just any Cryo application will suffice, but rather a consistent, high-frequency application of Cryo element is required to quickly break its defensive bar. Characters with multi-hit Cryo abilities or those that can apply Cryo continuously will be exceptionally valuable.
Counter-Strategy: Focus on bringing at least one, ideally two, strong Cryo characters capable of rapid and consistent Cryo application. The rotation should involve depleting the Cryo bar as quickly as possible, then swapping to primary damage dealers (Cryo or otherwise) to maximize damage during the vulnerable phase. Energy management for Cryo characters will be crucial to ensure their skills are available for subsequent Cryo bar depletion cycles.
3. Guardian Blade of Drifting Snow Boss
Origin and Lore: This boss, like Churin, is a "world boss from Snezhnaya," further solidifying the region’s theme of formidable Cryo-aligned adversaries. The name "Guardian Blade" suggests a sentinel or a weapon-like entity, possibly an elite Fatui construct or a powerful spirit of the frozen wastes, embodying the brutal elegance of Snezhnaya’s combat philosophy.
Core Mechanics:
The Guardian Blade of Drifting Snow presents a multi-phase combat encounter, with a significant defensive mechanic triggered at a specific HP threshold:
- Initial Phase: In its initial state, the boss is susceptible to various elemental reactions, including Stellar Glimmer, Pyro, Electro, and Anemo, allowing for diverse team compositions to deal damage.
- Shield Phase (80% HP): Upon losing approximately 80% of its total HP, the boss activates a potent shield. This shield must be broken within a given time limit to prevent detrimental outcomes and trigger advantageous ones.
- Shield Durability: The shield’s durability can be chipped away efficiently by the Stellar Glimmer reaction, with each successful hit reducing its integrity by 15%. This strongly implies Stellar Glimmer is the optimal choice for shield breaking. Pyro, Electro, and Anemo might also contribute, but Stellar Glimmer is presented as the most potent.
- Success Condition: If players successfully break the shield within the allotted time, the Guardian Blade receives a significant penalty: it takes 10% self-damage, effectively accelerating its defeat and rewarding efficient play.
- Failure Condition: Should the shield remain unbroken when the timer expires, the boss will heal itself, negating a portion of the damage dealt and prolonging the fight, making the encounter considerably more difficult.
Strategic Weakness: This boss is broadly weak to "Stellar Glimmer reaction, Pyro, Electro, and Anemo." However, the shield phase highlights Stellar Glimmer as the superior counter for its primary defensive mechanic, reducing 15% durability per hit.
Counter-Strategy: In the initial phase, players can utilize a strong offensive team leveraging any of the mentioned elements. However, once the boss’s HP drops to 80%, the focus must shift to shield breaking. A team capable of consistent Stellar Glimmer application is highly recommended to swiftly dismantle the shield and trigger the self-damage effect. If Stellar Glimmer is not feasible, a combination of Pyro, Electro, and Anemo (likely Swirl reactions to spread elements) can serve as an alternative, though potentially less efficient, method for shield depletion. Timing bursts and elemental applications for the shield phase is crucial.
Optimizing Combat: Recommended Team Compositions
Understanding the boss mechanics is the first step; the second is assembling a team that can exploit those mechanics. The "Stellar Glimmer" reaction appears to be a new or emphasized reaction for Version 7.1, and characters associated with it are pivotal for two of the three bosses. Similarly, rapid Cryo application is key for the remaining boss. The following team compositions are optimized for each encounter, leveraging specific character kits to counter boss mechanics effectively. Note: The characters mentioned are based on the provided hypothetical Version 7.1 context and their implied roles.
1. Churin: Stellar Glimmer Supremacy
Churin’s reliance on the Stellar Glimmer reaction for breaking its Ice Sculptures and reducing its resistances makes teams centered around this reaction exceptionally effective. The suggested teams leverage specific synergies to maximize Stellar Glimmer uptime and damage.
-
Sandrone Stellar Conduct Team:
- Character 1: Sandrone: As the presumed primary Stellar Glimmer enabler or damage dealer, Sandrone would likely possess abilities that either directly trigger Stellar Glimmer or provide significant buffs to characters that do. Their role is central to breaking Churin’s defenses.
- Character 2: Odette: Odette likely serves as a crucial support or sub-DPS, providing consistent elemental application that synergizes with Sandrone to ensure a steady stream of Stellar Glimmer reactions. This could involve off-field elemental application or reaction amplification.
- Character 3: Yae Miko / Alyosha C6: This slot offers flexibility. Yae Miko, if her kit aligns with Stellar Glimmer (perhaps through Electro-Cryo interaction or a new elemental infusion), could provide off-field Electro application and high burst damage. Alyosha C6, implying a powerful support or sub-DPS at maximum constellation, would likely offer significant buffs, debuffs, or elemental application critical for the team’s overall performance. Their role is to enhance reaction damage or provide additional utility.
- Character 4: Qiqi: Qiqi’s primary role would be a dedicated healer, ensuring team survivability against Churin’s attacks, especially the Giant Snowballs if sculptures are not broken in time. Her Cryo application (if Stellar Glimmer involves Cryo) could also contribute to the reaction.
- Strategy: The core strategy involves Sandrone and Odette consistently triggering Stellar Glimmer to rapidly destroy the Ice Sculptures. Yae Miko/Alyosha C6 provides additional damage or buffs, while Qiqi maintains health. Focus on cycling abilities to ensure Stellar Glimmer is always available for the sculpture phases.
-
Vesna Premium Team:
- Character 1: Vesna: Positioned as the main damage dealer or primary Stellar Glimmer applicator, Vesna would be the central figure around whom the team’s offensive capabilities revolve.
- Character 2: Odette: Again, Odette plays a vital role in enabling or enhancing the Stellar Glimmer reaction, likely through elemental application or providing a specific buff.
- Character 3: Vodyanitsa: Vodyanitsa likely fills a sub-DPS or support role, providing additional elemental application, damage amplification, or crowd control that complements the Stellar Glimmer focus.
- Character 4: Faruzan C6: Faruzan, at C6, is renowned for her exceptional Anemo support capabilities, providing massive Anemo damage buffs and resistance shred. If Stellar Glimmer involves Anemo or benefits from Anemo Swirls (e.g., spreading elements for reaction), Faruzan would significantly boost the team’s overall damage output and reaction efficiency.
- Strategy: This team aims for high damage output through Vesna, amplified by Vodyanitsa and Faruzan, all while Odette ensures consistent Stellar Glimmer application. The goal is to quickly enter and capitalize on Churin’s vulnerable phases.
-
Mizuki Stellar Swirl Team:
- Character 1: Mizuki: Mizuki is likely the main damage dealer or the key character for initiating the Stellar Glimmer reaction, possibly through a unique elemental infusion or a specialized skill.
- Character 2: Odette: Odette’s role remains consistent as a reaction enabler or elemental applicator for Stellar Glimmer.
- Character 3: Vodyanitsa: Vodyanitsa, similar to the Vesna team, provides additional utility, sub-DPS, or elemental application to support Mizuki and Odette.
- Character 4: Faruzan C6: Faruzan’s Anemo support is again critical, suggesting that either Stellar Glimmer itself or the elements involved in it can be significantly enhanced or spread by Anemo Swirls, leading to increased reaction frequency and damage.
- Strategy: This team, with its "Stellar Swirl" designation, implies a focus on using Anemo to amplify and spread the elements involved in Stellar Glimmer, making the reaction more potent and widespread against Churin and its sculptures.
2. Secret Source Automation: Cryo Barrage
The Secret Source Automation’s Cryo bar demands a relentless assault of Cryo attacks. The recommended teams focus on characters known for their strong Cryo application and damage.

-
Team 1 (Skirk, Escoffier, Furina, Yelan/Shenhe):
- Character 1: Skirk: Skirk, as a prominent figure, would likely be the main Cryo DPS or a powerful Cryo enabler, capable of dishing out consistent Cryo damage to deplete the boss’s bar.
- Character 2: Escoffier: Escoffier would likely provide additional Cryo application, sub-DPS capabilities, or crucial buffs/debuffs that enhance the team’s overall damage during the boss’s vulnerable phase.
- Character 3: Furina: Furina, the Hydro Archon, is a top-tier Hydro applicator and universal damage buffer. Her consistent Hydro application enables powerful Freeze reactions with the Cryo characters, which, while not explicitly mentioned as a weakness, can contribute to crowd control or simply allow for more uninterrupted Cryo application. More importantly, her damage buff scales with HP fluctuations, benefiting the entire team.
- Character 4: Yelan / Shenhe: Yelan provides exceptional off-field Hydro application and significant damage amplification, synergizing with Furina for powerful Hydro resonance and enabling more Freeze. Shenhe, on the other hand, is a dedicated Cryo support, providing immense Cryo damage buffs (via Icy Quill) to other Cryo characters, making her an ideal choice to maximize Skirk and Escoffier’s Cryo output. The choice depends on whether more raw Cryo damage (Shenhe) or additional Hydro application/buffs (Yelan) is preferred.
- Strategy: This team aims for a rapid depletion of the Cryo bar using Skirk and Escoffier’s Cryo skills, supported by Furina’s buffs. Once the bar is down, Furina’s universal buff, combined with the strong Cryo/Hydro damage, will devastate the boss.
-
Team 2 (Skirk, Citlali, Xingqiu, Charlotte):
- Character 1: Skirk: Again, Skirk leads as the primary Cryo damage dealer and bar-breaker.
- Character 2: Citlali: Citlali likely provides additional Cryo application or a specific utility that helps in depleting the Cryo bar or boosting the team’s damage against a vulnerable boss.
- Character 3: Xingqiu: Xingqiu is an off-field Hydro sub-DPS and minor healer, known for his consistent Hydro application. He would work similarly to Yelan, enabling Freeze reactions and contributing to overall damage.
- Character 4: Charlotte: Charlotte is a dedicated Cryo healer, providing essential survivability while also contributing to Cryo application, albeit less offensively than a dedicated sub-DPS. Her role ensures the team stays healthy through sustained encounters.
- Strategy: This team focuses on reliable Cryo application from Skirk and Citlali, supported by Xingqiu’s Hydro for Freeze and Charlotte’s healing. It might be a slightly more defensive option but still effective for Cryo bar management.
3. Guardian Blade of Drifting Snow Boss Guide: Stellar Glimmer for the Shield
The Guardian Blade’s critical shield phase at 80% HP heavily favors the Stellar Glimmer reaction. Consequently, the optimal teams for this boss are identical to those recommended for Churin, as they excel at triggering this specific reaction.
-
Sandrone Stellar Conduct Team: (Sandrone, Odette, Yae Miko / Alyosha C6, Qiqi)
- Strategy: The strategy here is to primarily deal damage in the initial phase using the team’s strengths. As the boss approaches 80% HP, players should prepare to unleash their Stellar Glimmer applications, focusing on the shield. Sandrone and Odette will be key to rapidly depleting the shield’s durability, ensuring the boss takes self-damage. Qiqi provides healing for sustained engagement.
-
Vesna Premium Team: (Vesna, Odette, Vodyanitsa, Faruzan C6)
- Strategy: This team’s high damage potential should be utilized in the first phase. Once the shield is up, the collective Stellar Glimmer application from Vesna and Odette, potentially amplified by Vodyanitsa and Faruzan, will be instrumental in breaking it efficiently. The goal is to minimize the time the shield is active and force the boss into its self-damaging state.
-
Mizuki Stellar Swirl Team: (Mizuki, Odette, Vodyanitsa, Faruzan C6)
- Strategy: Similar to the other Stellar Glimmer teams, Mizuki and Odette will be responsible for consistent reaction application. The "Stellar Swirl" aspect, likely involving Anemo characters like Faruzan, will help spread the necessary elemental aura to break the shield quickly. This team aims for speed and efficiency in neutralizing the shield mechanic.
Player Engagement and Community Impact
The introduction of the Stygian Onslaught in Version 7.1 has predictably sparked significant discussion within the Genshin Impact community. As with any challenging new content, players are actively engaging in theorycrafting, sharing optimal build strategies, and showcasing their successful clears across platforms like Reddit, YouTube, and Twitch. The specific elemental weaknesses and the emphasis on the "Stellar Glimmer" reaction have encouraged experimentation, leading to a temporary shift in the meta as players prioritize characters capable of exploiting these new mechanics.
Content creators are quick to produce detailed guides, speedrun videos, and "no-damage" challenges, further fueling community engagement. The six difficulty stages cater to a wide range of player skill levels, allowing casual players to earn foundational rewards while hardcore players strive for the highest tiers and leaderboard recognition. This tiered difficulty ensures broad accessibility while maintaining a competitive edge for dedicated players. The event also serves as a benchmark for the power of the newly released Version 7.1 characters, as players test their efficacy in this demanding environment.
Developer’s Intent and Future Implications
HoYoverse’s design philosophy for Genshin Impact endgame content often balances accessibility with challenging mechanics. The Stygian Onslaught, with its specific reaction-based weaknesses and timed shield mechanics, appears to be a deliberate effort to:
- Promote Elemental Diversity: By focusing on "Stellar Glimmer" and rapid Cryo application, the event encourages players to move beyond generic elemental teams and explore less common or newly introduced elemental interactions.
- Increase Strategic Depth: The requirement to understand and counter specific boss mechanics, rather than simply out-damaging them, adds a layer of strategic thinking to combat encounters.
- Validate New Characters: The efficacy of Version 7.1’s new characters (Sandrone, Odette, Vesna, Mizuki, Skirk, Escoffier, Citlali) in these challenges provides an incentive for players to wish for them, showcasing their unique strengths.
- Boost Replayability: The six difficulty stages and the allure of optimal artifact farming encourage multiple runs, extending the event’s longevity and player engagement.
- Test Future Mechanics: Stygian Onslaught could be a testing ground for mechanics that might appear in future permanent content or even in the Spiral Abyss, giving HoYoverse valuable data on player adaptation and difficulty tuning.
The successful implementation of Stygian Onslaught could signal a trend towards more mechanically complex and reaction-specific endgame challenges in Genshin Impact. This could lead to a more dynamic meta where different characters shine in various seasonal events, encouraging players to build a wider roster and adapt their strategies regularly.
Final Thoughts
Genshin Impact Version 7.1’s Stygian Onslaught stands as a testament to HoYoverse’s commitment to evolving endgame content. While the bosses—Churin, Secret Source Automation, and Guardian Blade of Drifting Snow—present considerable challenges with their unique mechanics, the event is designed to be conquerable through strategic team building and a thorough understanding of their weaknesses. The emphasis on the Stellar Glimmer reaction and rapid Cryo application highlights the importance of elemental mastery and character synergy. For players equipped with the recommended characters and a willingness to adapt their tactics, the Stygian Onslaught offers a rewarding experience, providing ample resources for progression and a satisfying test of skill. This event not only enriches the current gameplay experience but also sets a potential precedent for the future direction of Genshin Impact’s combat encounters.